Adobe Photoshop Tutorial – Making your photos POP! With Unsharp Mask
This is a quick Adobe Photoshop tutorial for making your photographs really come to life using a few simple tools. Along with this tutorial I will include a couple of handy Adobe Photoshop actions allowing you to quickly apply this process in one simple step. Lets begin!
First and foremost this process should be one of your final steps in your photo editing. Use this once you’ve already corrected for white balance and any other colour corrections, as well as any skin touch ups that you plan on doing.
Once you’re done with all your main touch ups, create a new master layer first by selecting your top layer (Alt + . ) and then clicking Alt + Ctrl + Shift + E ( Cmd + Opt + Shift + E on a Mac) This will create a top layer with all of your previous adjustments applied.
With the new top layer selected go Filter >> Sharpen >> Unsharp Mask
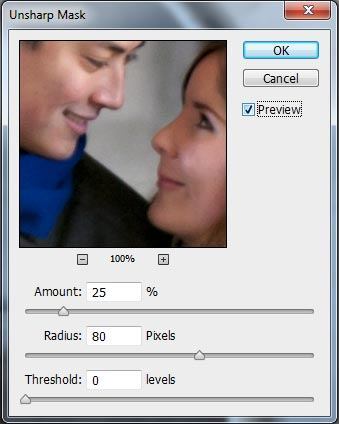
The settings you want to apply are:
Amount: 25%
Radius: 80 Pixels
Threshold: 0 Levels
And click OK
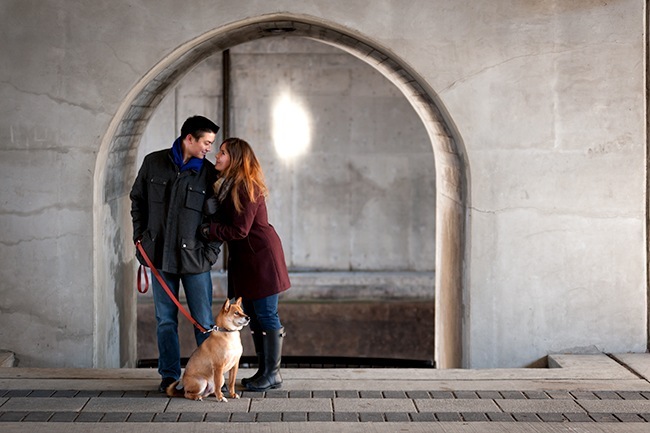
That’s it! A simple adjustment in which you will see a slight increase in mid-tone contrast that will really bring your photograph to life.

After applying this process I would also suggest using “smart sharpen” to sharpen your final photo and also convert your colour space from Adobe RGB or ProPhoto RGB (which ever setting you have on your camera) to sRGB as this colour space will look best on the web and also ensure proper colours when printing on standard inkjet photo printers.
Here are the Adobe Photoshop actions so that you can make this adjustment in one simple step. In this action set I’ve also included an action for smart sharpen and conversion to sRGB.
Enjoy!